Saturday, April 29, 2017

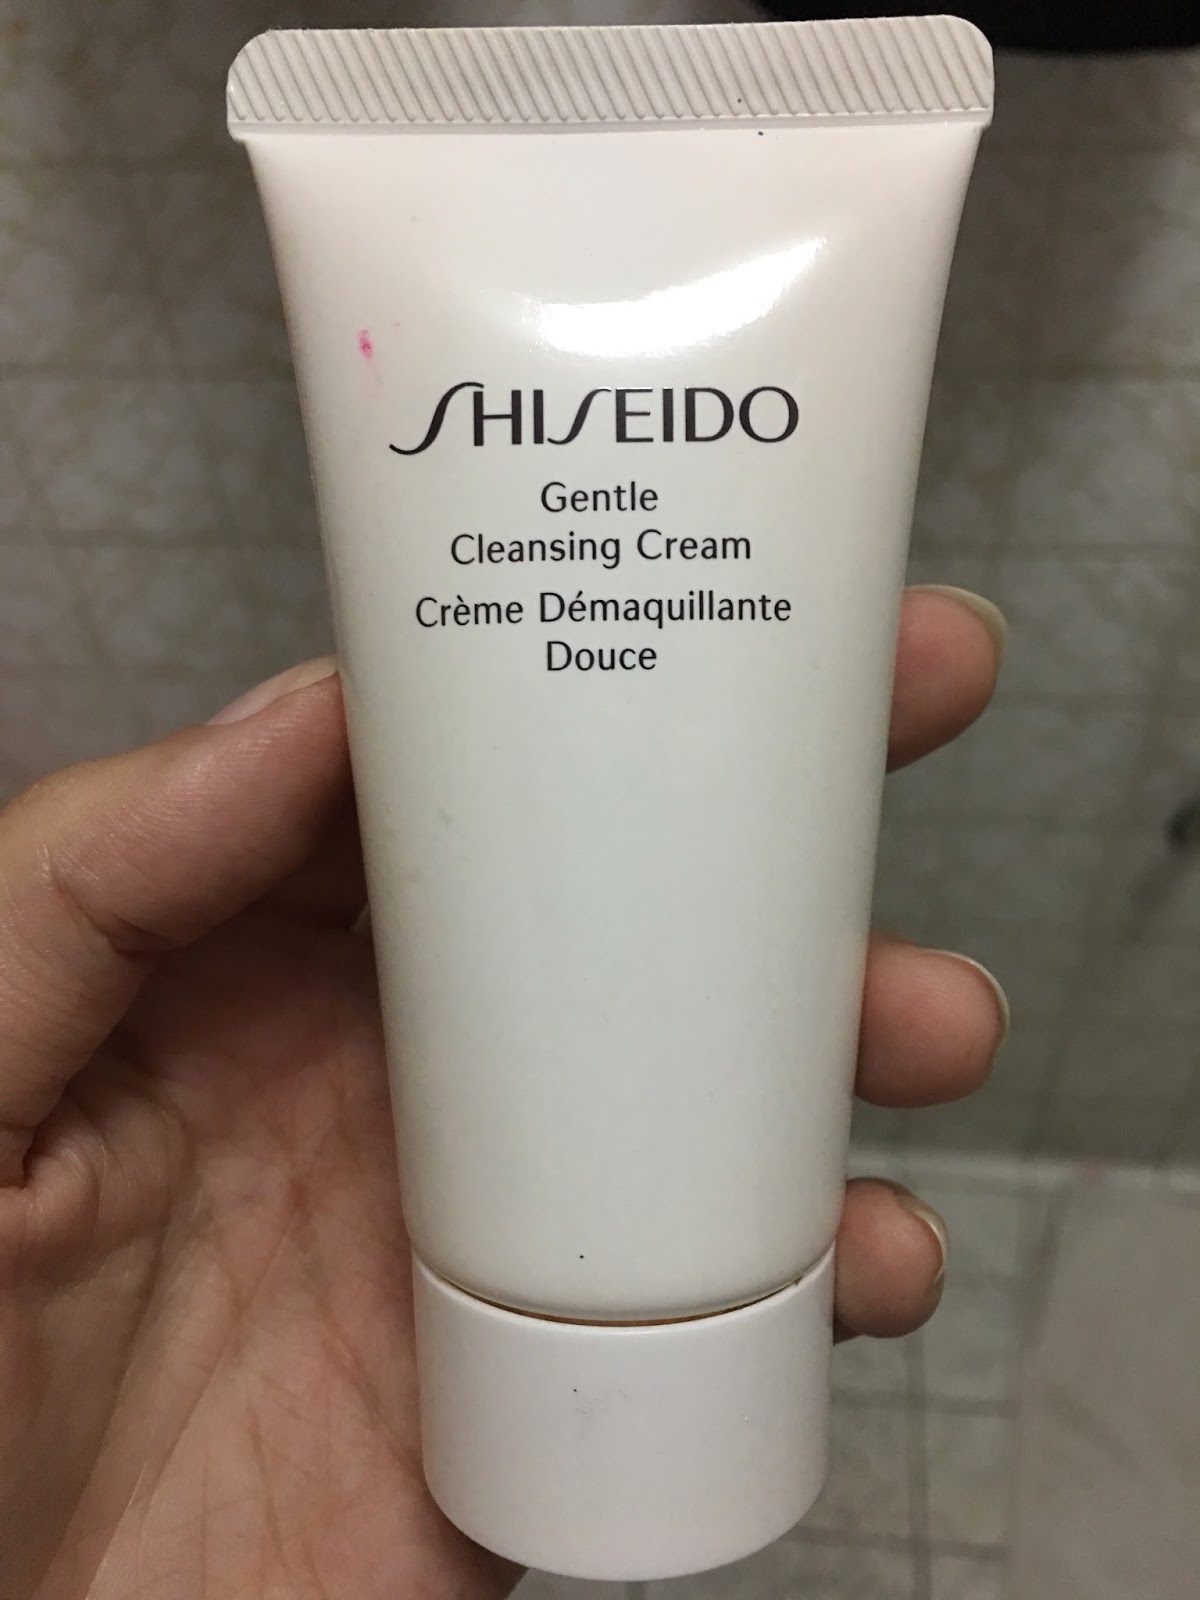
MAKEUP REMOVER: SHISEIDO GENTLE CLEANSING CREAM

Hey, guys I'm back again! :) SHISEIDO GENTLE CLEANSING CREAM IS SOOOOO GOOD that I decided to blog about it. If you're looking for a very gentle, moisturizing, and effective makeup remover, this is your product!

 I just got this for FREE btw, when I bought Shiseido's Syncro Skin Lasting Liquid Foundation. According to their site this costs 30$ and comes in 180 ml tube. As for mine, it's kind of like a sampler given the small size.
Here is the product description from shiseido.com:

DESCRIPTION:

Your essential daily makeup remover.

An ultra-light cleansing cream that effectively melts away makeup and impurities while retaining skin’s essential moisture. Can be tissued or rinsed off and leaves skin soft, smooth and comfortable.
  • Pampers skin with a unique cleansing action
  • Purifies thoroughly without stripping away moisture
  • To use: Smooth a generous amount of cleanser evenly over face using gentle circular motions. Rinse or tissue off.
FOR ALL SKIN TYPES. NON-CLOGGING TO PORES. DERMATOLOGIST-TESTED.

HOW TO USE?
It could be used either as a facial cleanser OR makeup remover! Whatta deal right?:D
A pea-sized amount of cream and what it looks like on closeup. Don't be fooled by its looks, it's actually very thin in consistency and not heavy. :)


The trick is pretty simple! What I do is apply it on my face and massage in circular motion including the eye area then I use tissue to take the makeup off.


 Voila! Makeup is transferred to the tissue. This was my first wipe. I went for the eye area first to show its efficiency on that area (which we know is a bit more stubborn than the others) and a lil on my cheeks. Here's how much product got removed:

And so, I continued on my entire face. I had to repeat the process atleast 3x to completely remove the layers of foundie, eyeshadow, lippie, etc. Now, showing you the tissue with everything taken off with just a few more wipes as you can see:


My face after using SHISEIDO GENTLE CLEANSING CREAM:


Since I took these during nighttime, I had but low lighting and tried my best to make it of good quality in the least. It also seemed like not much changed except the eye area. I don't wear heavy makeup as I don't need to. On my face I had Maybelline BB Cushion and Maybelline Pressed Powder to set it. While Etude Zero Sebum as my retouch powdie.
Disclaimer: I still wash my face with Lanelle Kojic Soap (staple product) after the wipes as to prevent my face from breeding pimples. Giving you a brief skin history: it's very oily and acne prone with large pores. That's why I can't get by a day without using my topical meds. While for those with already good skin, I think this would be a great facial cleanser alone! :)

THE EXPERIENCE:

* What I love about this cleanser/makeup remover is HOW SMOOTH, SOFT and GLOWING MY SKIN IS AFTER! Your fingers practically glide as you touch it! I kid you not! Best for those with boyfriends who like touching their girlfriends' faces. LOL.

!!! It does claim to its "pampers skin and purifies thoroughly without stripping away moisture" description. !!! :) :) :)

I was mind blown to the point that I wanna add this on top of my cleansing routine just to gain more of that brightening effect. I've noticed how Asian products always opt for that. I tried to look for more of their skin care line, most of them are anti-aging products and not so much on the anti-acne front. 

* The smell gives off a very slight floral-like feminine scent. Nothing strong but very soothing and relaxing to the senses.

* For the price, it is pretty expensive. Well, what do we expect from the top-of-the-line cosmetics brand? It is worth it anyways!

* Mine just ran out tonight. Just in time for me to finally review about it! And I just might buy another to add it to my routine before washing my face! :p

FURTHER TIPS IN REMOVING EYE-MAKEUP:

Oh yeah, before I forget you know how arrogant our eyeliners get? Which for me is the most annoying to remove. And you thought you've erased everything, you wake up like a panda on the loose! So, grab your Q-tips, dab baby oil and start cleaning that mess.

With the help of cotton buds you can be more precise in cleaning corners and such. See how much black gore I was able to remove with this thang? :p Prepare your Q-tips for tomorrow coz I'm sure there's more of that where it came from!

Well, I hope this helped you out! Because you wanna make sure you rid your entire face of makeup before going to bed as this might clog your pores and give birth to new acne in the morning.

Feel free to comment below or ask questions!
Toodles loves! xoxoxoxo


Sunday, April 23, 2017

DIY WAX: HONEY MAGIC WAX


Looking for painless hair removal for a hair-free summer? Tons of waxing salons available out there but have no time for it? Good news ladies because Honey Magic Wax is here to save you from your lady-struggles. :)

Been there done that! I've been to that phase of regularly going to salons for hair removal on my armpits. A weekly visit become tedious in the long run and not to mention, getting pricey on top of our other lady-needs. 

I've also tried a product similar to this before and hurt my armpit like there's no tomorrow. It doesnt have a pre and post care product to go with it. Plus, I had to literally melt the pan on top of our stove. The only thing missing is me singing "kumbaya" while I'm at it. LOL.

However, there's always a rainbow after the rain right? So, I've discovered Honey Magic Wax on BeautyMNL or www.beautymnl.com
 And ladies, do try to check out that shopping site because I tell you, a lot of affordable and great products await you. Some stuff that cannot be found in the market are available here. It might surprise you as it did on me. 

Register an account first on the link stated above and you can pay thru PayPal, Debit or Credit Card which I got mine using my Debit Card.
If you order on the weekend, it'll be processed on Monday. My parcel arrived Tuesday.
The product itself costs 890 php plus 50 php for delivery with a total of 940 php.


Photos by J3 Photography

The products are contained in a cute see-through pouch, which you can definitely use as a makeup bag or travel kit in the future!
Photo by J3 Photography

And here are the contents:

Photo by J3 Photography


They are numbered accordingly in order of use.
(1) Honey Magic Cleansing Solution / Pre-Wax Spray
(2) Honey Magic Wax
(3) Honey Magic Soothing Cream / After-Wax Cream
Also included are 2 bundles of wax strips and wooden spatulas. With the kit, are instructions of use which I will now delve on:

Photo by J3 Photography


  • Honey Magic Cleansing Solution (Pre-Wax Spray): A soothing spray that preps the skin and provides it with a cool and comfortable feeling. 
    • Spray and spread it on to prep the skin. When applied, it gives off a cooling sensation as if your skin ate mint. :))  Just make sure you close your eyes when spraying on your pits to protect it.

Photo by J3 Photography

And the main boxer in the ring....

  • Honey Magic Wax: A honey-based depilatory wax for fuzz-free healthy skin.
    • Microwave for 25-30 seconds only with the 2 lids removed. Please take note of this.


    • Use the wooden spatula to dab into the content and butter up your pits like bread or whichever area you want hair removed. Personally, I only do my pits and lower leg just inches above my feet where my hair is uneven. The good news however you can also use this baby "down there" if you know what I mean. Hehe!
    • The SCENT btw is heavenly! Legitimately smells like honey and isn't that strong. 
    • There are 30 wax strips ready-to-use included in the whole package of Honey Magic.


I am amazed on how clean this wax works! You can see the difference where the strip went off.  Your hair, btw, should be atleast 1/4 inch long for it to cling on. I have very thin hair on my pits including uneven growth. What I do with the missed hair is use the faithful lil' 'ol tweezers to finish the job. But, if you have it longer than mine, I think you wouldn't be needing the tweezers since it really does the work.

What about the pain? Compared to the product I used years ago that led to bleeding and made my chicken skin worse, this on the other hand was PAINLESS. I cannot believe it myself. I mean yes, the wax was a bit hot but very tolerable. As for the stripping part (we all know this is not everyone's favorite), it glided so smoothly and I almost felt no pain. Kudos to this!

Now for the POST-CARE:

Photo by J3 Photography

  • Honey Magic Soothing Cream (After-Wax Cream): A post-wax treatment that helps calm skin and relieve inflammation.
    • Apply this on areas waxed to soothe the area.

POSSIBLE QUESTIONS YOU MIGHT ASK:

How to remove the sticky residue? You can soak cotton in water or use baby oil. It usually does the trick!

Where to get extra wax strips? I'm sure some of us do a full-body waxing and might be short on the available strips that come with the package. You can actually buy extra's and have different length choices at our very reliable local drugstore, Watsons. I visited the one of the outlets and they have 2 brands available, costing around 20++ php with usually 12 sheets each. So, there you go! Future dilemma solved! :)

Honey Magic Wax helped me prep for a swimsuit funshoot last weekend. Sharing some of the RAW photos also by J3 Photography (no filters/edits to show my skin specifically the legs and pits):


Check out Honey Magic at https://www.facebook.com/HolistiqueMed/ for more deatails and info on the product! Have a great week loves! <3

---
YOU CAN BUY YOUR HONEY MAGIC WAX KIT HERE:
https://www.lazada.com.ph/products/honey-magic-honey-waxing-kit-i112672840-s115336188.html?spm=a2o4l.searchlist.list.1.7dac7b23IIXOOr&search=1

FOLLOW UP BLOG ON THE PRODUCT:
** My armpit hairs grew thinner the next week!
** The Honey Magic Soothing Cream can also be applied after plucking to relieve redness/inflammation! Since there are times I just need to remove a few hairs I resort to plucking. I tried applying the Honey Magic Cleansing Solution as a pre-treatment and both products worked great either by wax or by tweezers!

Sunday, January 15, 2017

REVLITE FROM SKIN 101 REVIEW


About my skin condition: 
* Dull
* Puffy Eyes/Dark Circles
* Creases around the mouth
* Icepick Scars
* Blemishes/Post Acne Marks
* Large Pores
* Acne-prone
* Oily

Because of age, a plethora of trial and errors with beauty products my skin struggled a lot. It looked more tired and dull in the process even under all the makeup. So, I went to the nearest and affordable but quality clinic. My first plan was to go for the PIXEL. This was Skin 101's version of Fraxel. It costs around 8k php per session however with just one it already shows a BIG difference on skin's texture and overall condition. The thing is though, downtime will take you about 5-7days. There will be peeling and flaking of skin as I've observed and read in other blogs. My work cannot allow that much downtime since it was already the "ber" months  and a constant slew of events just keep coming in. So, I searched for another alternative and found out about Revlite. Actually, I already had knowledge on this but never realized that it was also perfect for my skin condition. I thought it was only for patients with already great skin and just needs a touch of glow. But, man was I wrong!

Here's a brief description on Revlite by Campbell Patch:

What is Revlite Treatment?


The treatment is a non-invasive procedure that uses beam of light as high-energy pulse to disintegrate melanin deposits. The revlite laser is applied to remove any kind of scar or discoloration like acne spots, sun tans, age spots, liver marks, sun freckles or even a tattoo. Further, the laser promotes collagen growth underneath the skin. This results in firmer and younger looking skin.
DETAILED INFO ON MY REVLITE EXPERIENCE ON FACE FROM SKIN 101:
SKIN 101 Package: 3,000 php per session inclusive of CLEANING, DIAMOND PEEL AND REVLITE TONING.
15,000 php package: 5 REVLITE SESSIONS + 2 FREE SESSIONS = 7 SESSIONS.(save 6k) Package also includes: CLEANING, DIAMOND PEEL AND REVLITE TONING.
PREPARATION: Do not use topical medications such as astringents, tretinoin, clindamycin, etc. 3 days before the treatment.
DOWNTIME: None. You can already wash your face with a mild soap/cleanser. Use of topical medications will have to cease for 3 days after Revlite treatment. Do wear sunblock too and moisturizer!
POST-TREATMENT EFFECTS: Slight redness or red patches on face. Skin is sensitive and would sting a little.  Skin might breakout but, do not despair it will dry up in a few days.
WILL IT HURT?: It's like small warm needles touching your skin. From a pain scale of 1-10, 10 being the most painful I'll rate it at 3-4. Make sure your skin is not sensitive at that time because the lasers will feel hotter and more stinging. 
BOOKING: Set an appointment at least a day before because they are usually fully booked on the day itself.
BRANCH THAT I GO TO: Skin 101 Alabang Town Center & Laser 360 Dermatology and Laser Clinic in McKinley Rd, Forbes Park  (also Skin 101's branch under a different name).
DO I NEED A PRESCRIPTION FROM THE DOCTOR FIRST?: No need. Walk-in patients are accommodated and may avail of the treatment as long as there is an available slot.
HOW MANY SESSIONS DO I NEED?: Maybe 5-10 for maximized results. But with one session you will already have that post-effect glow, rejuvenated skin and slightly visible changes on skin texture.
BEFORE AND AFTER PICS:
BEFORE PICS:


AFTER:
CHANGES ON SCARRING, BLEMISHES and OVERALL SKIN CONDITION
1st REVLITE SESH
(October 2016)


POST-GLOW EFFECT 

1st SESSION (October 2016)

                                          1st day                                                 2nd day


4th day
* Glow remains for weeks and almost permanently with proper maintenance.

* Slight scabbing/redness from facial cleaning.

* A few breakouts from Revlite treament


NOW AFTER 6th SESSION of REVLITE
PICTURE TAKEN JANUARY 6, 2017. 
No filter. Proper lighting. Taken from a Fujifilm XT10 camera. RAW.


Might be going for 7-10 sessions in total to get maximum benefits. What could I say but, I am VERY HAPPY AND WOWED by the results. I've noticed that my facial hairs have become bleached/blonde. My skin remained glowing until now. Something I would like to try on my underarms in the future. It is my lifelong dream to go makeup free! Before I couldn't even handle a day without makeup outside because of my flawed skin. But I received a miracle thanks to Revlite! It takes a lot of time and patience but it's all worth it!

PINK PARADOX: I will talk about my new skin care routine to maintain this glow and control acne.